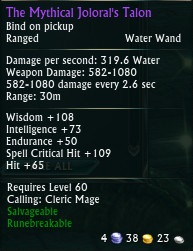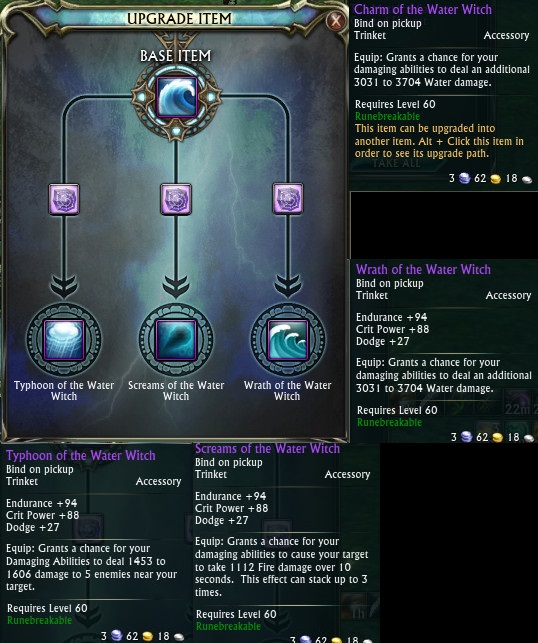
Intrepid: Drowned Halls (“iDH”) is the new refurbished Tier 1 Level 60 10-man Sliver. It’s a Level 62 version of the old Level 50 Drowned Halls Sliver with minimal mechanic changes.
Note: It’s very easy. Has fantastic loot. Don’t miss out!
Table of Contents:
- Entrance
- Trash Drops
- Assault Commander Jorb
- Joloral Ragetide
- Isskal
- High Priestess Hydriss
Entrance
Firstly, you’ll need one person in your raid to jump into the instance in order for everyone else to get in.
You’ll need either Quantum Sight (Defiant) or Omen Sight (Guardian) planar abilities that you buy from Sanctum or Meridian Planar vendors (the same place you get your Summon Rescue Medic ability).
Put up your Quantum Sight/Omen Sight buff and head to the lowest stairs leading to Lord’s Hall in the zone, Scarwood Reach. (3090, 4117).

The portal to the right is Intrepid: Drowned Halls. (the left one is Level 50 Drowned Halls).
Trash Drops
You’ll find that sometimes the trash mob packs in iDH can be harder-hitting than the actual bosses themselves.
Luckily, you are rewarded with a pretty high rate of trash drops. In my first run we got 3 trash drops and other raid groups have been reporting several trash drops as well.
 |
 |
 |
Assault Commander Jorb

Raid Composition:
- 1 Tank
- 1-2 ST Healers
- Optional AoE Healer or Bard
- Rest DPS
Mechanics:
PlayerName, stand at attention!
He will emote “PlayerName, stand at attention!” at a random player every now and then, teleport the player to him and then stun that player for a few seconds.
PlayerName, you can’t hide!
This mechanic hits a random player and causes them to have the ‘Fear’ status. This debuff is cleansable. You can use Break Free to break out of this.
Strategy:
- Tank – needs to run through the boss so that the boss faces away from the stunned player (person Jorb emotes for “Stand to Attention”).
- Melee DPS – has to run through to the side that the stunned player is at. This way, Commander Jorb’s cleave won’t hit anyone other than the tank.
- Stunned players – after their stun is off, simply return to their position – either with the rest of melee dps or with ranged.
- Ranged stays at range to the side of Jorb.
- Healers cleanse whoever is feared with “you can’t hide” emote. Note that you can use Break Free.
Note: His cleave is rather large and almost 180 degrees in front of him so you want to be behind him at all times if you are melee dps.
The only reason why there’s more than one healer is to mitigate RNG, just in case the healer is stunned or feared (with Break Free abilities on CD).
Loot:
(will be updated over time)

Joloral Ragetide

Raid Composition:
- 1-2 Tanks
- 1-2 ST Healers
- Optional Bard
- Rest DPS
Mechanics:
Joloral Ragetide glares at PlayerName
Joloral will emote “Joloral Ragetide glares at PlayerName” on a random player. That player will then get a green circle around them and be stunned/locked in place. After a short while, anyone near that player will also get stunned.
You can Break Free from this ability.
Adds
Have the Off-Tank tank the other adds. As for seacaps, have the other tank eat some of the seacaps to spread the damage increase. When a big add or the boss is near a seacap, they’ll eat them to gain a damage buff. So it’s good to spread them between the Boss and the large Adds.
Strategy:
- Make sure you are inside the encounter before you begin. Unlike in Lvl50 DH, you need to be below the middle section of the stairway leading to the encounter, otherwise you’ll be locked out.
- Have your Main Tank tank Joloral Ragetide next to the stairs the entire encounter.
- Have your Off Tank tank the other add and move it across seacaps to eat them (instead of the Boss eating them).
- Spread out to avoid getting stunned. Use Break Free if you do get stunned.
Fairly simple fight. Add a healer if you think you’re having trouble keeping the tank alive. That said, you can potentially do this encounter with a single Tank.
Loot:
(will be updated over time)
 |
 |
Isskal

Raid Composition:
- 1 Tank
- 3-4 players with Interrupt
- 1 ST Healer
- 1 AoE Healer
- Optional Bard
- Rest DPS
Mechanics:
Ice Shard
This is cast fairly often over the course of the fight. Interruptible. If not interrupted it will deal damage to the raid. Unlike Lvl50 DH, missing an interrupt won’t kill anyone.
Spray of Hail
This is a raid-wide AoE attack that Isskal does. Deals ~ 6k-7k Water damage. Just heal the raid back up.
Currant Phase
At some point during the fight he’ll cast a spiral currant in the room with emote “Go with the current – or die!”. You’ll need to run in the same direction as the Wave or else you’ll take ticks of damage. It’ll go in one random direction (left or right), then switch to the opposite direction. Seacap adds will also spawn that you can dps down.
Glacial Wave Phase
At some point during the fight he’ll cast Glacial Wave which is a movement phase. There will be 3 Rings around the room. An Inner Ring, Middle Ring and Outer Ring.
Only one of these rings is safe. The ‘safe’ zone’ is the section that doesn’t have glowing/animated blue lights and ripple animations.
 It seems that unlike Lvl50 DH, the starting point is random. I’ve seen the starting ring be the Inner Ring, and at other times the Middle Ring.
The above image shows the Middle Ring is safe. The Inner and Outer Rings have blue textures that indicate that those rings are about to deal damage. At this point you can still safely move in-between Ring sections.
However, once a Ring receives a ‘watery’ blue texture on it, it means if you are on top of it you will take ~16,000 damage per tick.
It follows a pattern.
If it starts in the Inner Circle:
Inner -> Middle -> Outer -> Middle -> Inner -> Middle
If it starts in the Middle Circle:
Middle -> Inner -> Middle -> Outer -> Middle -> Inner
Strategy:
- Confirm which players will interrupt and in what order prior to starting the encounter. If you are using voice chat, have someone call out who is interrupting next. Otherwise use Raid Warning or hope the interrupters are paying attention.
- For Currant Phases, ensure you are running in the correct direction. It starts off in one direction, then switches to the opposite direction.
- For Glacial Wave Phase/s, make sure you are standing in-between the Inner Ring and Middle Ring so you have plenty of time to run into the correct one. The Ring pattern goes one Ring at a time until it hits the Inner Ring, then it reverses back to the Outer Ring, then back towards the Inner Ring. (check the patterns above in the Mechanics section for more info)
Loot:
(will be updated over time)

High Priestess Hydriss

Raid Composition:
- 1 Tank
- 1-2 ST Healers
- Optional AoE Healer
- Optional Bard
Mechanics:
Pre-Hydriss Add Pack
At the start there will be several Add packs in the middle. Just pull them all together and AoE them down.
Tsunami
Hydriss constantly casts Tsunami. This is a ‘wave’-type cleave that she points in random directions. Her Tsunami does not hit directly behind her, so if you stack behind her, or at least are directly behind her (even in ranged) you should be able to avoid this.
Cleanse Mechanic
She’ll turn a random player into a Seacap. That play will be feared and unable to use abilities. Have your healers Cleanse this or Break Free.
Dragon Whelp Add
A dragon whelp add will emote “I answer the call of Hydriss!” and start descending from the stairs. Have the tank pick it up. It generates a Blue Aura around it that decreases damage and healing of players inside the Aura. DPS it down.
Hive Phase
At some point Hydriss will emote “The power of the Water Plane is unleashed” and two Hives will spawn, generating adds. Incoming damage on Hydriss will be reduced during this phase.
DPS the Hives, ignore the adds.
White AoE circles will appear that will damage you. Avoid them. However, the tank should tank the adds in such a way that they are on top of the AoE circles as those circles will also damage them.
Once both Hives are destroyed, you can turn to killing the remaining adds.
Bubble Phase
At some point Hydriss will emote “Your death is nigh, heretics!” and will float up. A large Bubble will appear somewhere in the encounter area. You need to stay in this bubble to be immune to her raid-wide AoE attack.
However, 3 Water Elemental adds will spawn near the Bubble and slowly move towards it. If they touch the Bubble, the bubble ‘pops’ and you will no longer be Immune to her raid-wide AoE attack.
To prevent them from popping the Bubble, DPS them down and use Knockbacks and other CC to prevent them from reaching the Bubble.
Strategy:
- When you start the encounter, Hydriss will be immune to damage and she will be hovering down the stairs in front of the encounter. Once she reaches the bottom, she becomes active. Kill the add packs prior to that.
- Stack behind her. Whether in melee or at range, just make sure to be directly aligned with her back.
- Cleanse people who turn into adds and/or Break Free.
- When Dragon Whelp spawns; Tank picks it up when in range. Ranged players stay out of the bubble. DPS the add down.
- When Hives appear, DPS them down. Avoid White AoE. Tank pulls adds onto White AoE to damage them down. When Hives are destroyed, dps remaining adds.
- During Bubble phase; run/mount towards the bubble. Stay inside and DPS down the water elemental adds that spawn near the bubble. Use Knockback and other CC abilities to prevent them from reaching the bubble.
Loot:
(will be updated over time. Hydriss drops 2 pieces of loot in a chest at the center of the encounter.)


And that’s it! Have fun with all these awesome loot drops in Intrepid: Drowned Halls!
Good guide