
Return to Deepstrike is a new Level 60 Expert Dungeon that is revamped from the Level 50 The Deepstrike Mines dungeon. It contains several bosses and a ‘destroy teleporters’ objective, as follows:
- Destroy teleporters 0/4
- Defeat Ironclad Goliath
- Defeat Jorthan
- Defeat Nemesis IV
- Defeat Ionraic
- Defeat P.a.U.L.A. before time runs out
Click below for a guide on each boss:
Destroy Teleporters 0/4

Firstly, there are 4 teleporters you have to destroy scattered throughout the dungeon. You won’t miss any of them because they are surrounded by adds and fairly obvious-looking. Simply click on the panel at the base of a teleporter to destroy it.
Adds
The adds in the dungeon mainly involve 3 different types.
Awakened Titan

These are the large giant golems. They constantly put two debuffs on you. One snares, the other reduces your STR and DEX by 80%. The snare shouldn’t be of any concern, but the massive reduction in STR and DEX ‘could’ be depending on how they work.
I am unsure if Rogue and Warrior tanks get a WIS+INT debuff instead, or if they also get a STR+DEX debuff. If they get a STR+DEX debuff than the healer and tank may have to be careful with this add. This add hardly affects Cleric tanks.
Titanguard + Construct Workers

These adds defend each Teleporter. The Titanguard is a melee add and the Construct Workers are ranged adds. Depending on where the Construct Workers are, if you are a tank, you’ll want to save a pull for them to make it easier for DPS to take them down.
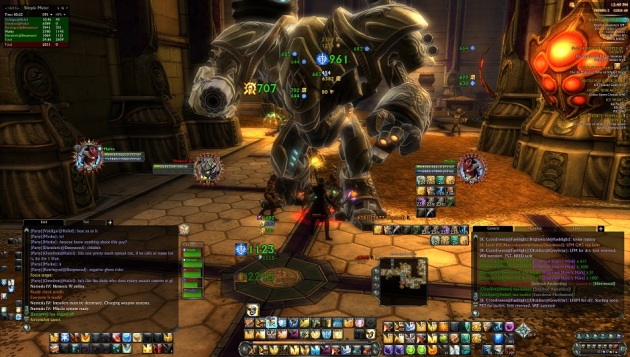
Ironclad Goliath

The Ironclad Goliath looks like the first boss of Golem Foundry. He has several abilities, but for the most part is fairly easy:
Autoattack
He autoattacks. Simply have your tank tank.
Land Mines
He’ll cast “Land Mines”. Uninterruptible. Simply avoid the land mines that spawn (like with Manslaughter in Golem Foundry). They’ll appear then start pulsing which will indicate that they have ‘activated’. They don’t do a lot of damage individually so you could get your tank to go over some of them if you want.
Falling Iron
He’ll cast “Falling Iron”. Uninterruptible. It’s a melee AoE knockback attack that deals a fair amount of damage. No one will die if at full hp, but if a non-tank gets knocked back into some mines, it could get nasty. All in all shouldn’t concern you too much.
Tractor Beam
He casts “Tractor Beam”. Uninterruptible. He’ll emote a random player “Ironclad Goliath targets *player* with a tractor beam”. It puts a debuff on the target that deals damage over time. You can cleanse this.
Electromagnetic Burst
He casts “Electromagnetic Burst”. It IS interruptible. You MUST interrupt this very quick cast or else the entire group (minus tank) will die. The tank and any other players with interrupt should be focused on waiting for this blue cast bar skill to appear.
It appeared twice for me during the fight – but it could appear more times depending on your dps.
Summary:
- Avoid Land Mines.
- Move out of melee when he casts Falling Iron.
- Cleanse Tractor Beam.
- Interrupt Electromagnetic Burst. PRIORITY!
- Burn boss.
Jorthan

The second boss, Jorthan can be found in a small room. He is a fairly simple boss to deal with.
Autoattack
Again, tank tanks.
Scissor-hands Construct
Can’t recall the exact name of these constructs, but they’re the bigger ones with scissor-hands. They attack you – tank should get aggro and face-tank them. Don’t DPS these adds or the Boss will enrage!
Unstable Construct
These are the more important adds. They are the smaller constructs with red lasers holding their armor pieces together. These adds are slow-moving and spawn in the corners of the room. Don’t let them near you as they explode, dealing massive damage. Two blowing up at once will likely kill off a lot of the non-tanks.
To avoid them, simply have the tank backpedal around the room whilst tanking the boss and Scissor-hands Constructs. The Unstable Constructs move pretty slowly so you should be able to avoid them all.
Summary:
- Avoid going near Unstable Constructs. DPS them down if you want.
- Have tank kite/backpedal the boss and the other adds.
- DO NOT kill the Scissor-hands Constructs.
- Burn boss. No need to kill adds – although if you’re having trouble with dps/tank/heals, you can choose to kill the Unstable Constructs.
Note: When you first aggro him, he’ll talk a lot before becoming attackable. Best not to burn CDs whilst he’s talking as he is immune. This applies to both dps and the tank’s aggro CDs.
Tormented Titan/Sinister Presence

Right after you exit the room that Jorthan is in, you’ll come to a corridor with a Teleporter nearby. If you look the other way to a dead-end, you’ll find the Tormented Titan, which will spawn a Sinister Presence once defeated.
Like with all Sinister Presences in the other Expert Dungeons, you’ll need to avoid being in melee range (since he’ll randomly attack someone in melee), cleanse the debuff that gets put on a random player (if you don’t, it’ll spawn an add when it times out), avoid the conal attack and interrupt the interruptible cast.
It’s not advised to take this add on if your tank or healer isn’t decently geared.
Nemesis IV
The third boss, Nemesis IV looks like Manslaughter from Golem Foundry. He is in a corridor right after your 3rd Teleporter.
Autoattack
Tank.
Burst Fire
An annoyingly fast cast 3-4 shot ability. He targets a random player with it and there’s pretty much no time to line of sight it. Interruptible. It’s like ‘Rotary Cannon’ with Manslaughter except this does 3-4 hits on you pretty much immediately. Some players may die to this ability.
Spread out. (it might help)
Precision Strike
He’ll do a Precision Strike that will attack everyone. Cleanse the debuff.
Grenade Launcher
He’ll cast Grenade Launcher which will lob a grenade, causing an AoE bubble attack. Just avoid it.
Summary:
- Heal through player-targeted Burst Fire or Interrupt.
- Avoid Grenade Launcher’s AoE.
- AoE cleanse.
- Burn Boss.
Ionraic

The second-last boss, like Jorthan, this guy likes to talk. Don’t blow your CDs whilst he is talking as he’ll be immune.
Autoattack
Tank it.
Double Pound
As the name implies, he pounds the tank twice in quick succession. This does ~ 6-8k of unmitigated damage each. It’s not really something you need to pay attention to as he does it fairly often – just need to heal through it.
Sandstorm
Like the weekly raid boss Kaaz’Ra in the Dendrome, Ionraic casts Sandstorm and then a large AoE around him will cause damage to anyone inside. Run out if you aren’t the tank.
Cobalt add
An add named Cobalt will spawn. Tank maintain aggro on it and DPS should take it down. It’ll eventually gain a buff with a countdown. Not 100% sure what will happen if it counts down, but I’m guessing a wipe.
3%
At 3% hp, he’ll become immune and run towards the gate at the back of the room, opening it to allow you to begin the final encounter. Stay well away from the gate so that you don’t aggro the final boss.
Summary:
- Run out for Sandstorm unless you’re the tank.
- Spread out.
- Destroy any adds that pop up.
- Stay well away from the gate when Ionraic hits 3% hp.
P.a.U.L.A.

P.a.U.L.A. is the giant blue crystal in the middle of the next room. Note that you will aggro her near the entrance and the gate will shut shortly after so you’ll want to run in as a group.
Update (11/18/13): Vladd has confirmed that in the next hotfix, sentries will gain threat as per normal but only be damageable to 50% hp (so still unkillable, but can now be properly tanked). So if you are having trouble surviving in a 4 DPS 1 Healer composition, a tank will be able to properly hold threat on sentries.
Composition of the group can be 4 DPS and 1 healer, no tank. This depends on your DPS though because this is a time-constrained fight. If your DPS is okay, you can have your tank hold aggro on Titanguard Sentries. Otherwise, just DPS burn.
Note: From the forums, it seems only a Cleric Tank is capable of holding aggro on the Titanguard Sentries due to overhealing threat.
The healer should have decent AoE heals but also decent ST-reactive abilities.
Power Level
You’ll notice a Power Level cast bar throughout the fight. If that cast bar reaches maximum, your raid will wipe.
Lightning Arc
She does an AoE ability with an emote “P.a.U.L.A. releases electrical energy into the room.” This will deal approx 1,600 – 1,800 Air damage per tick to all players until the channel ends.
Conal Attack
Can’t recall the name, but she does a Conal Attack with a fairly obvious red cone shown before the attack commences. Avoid it.
Titanguard Sentry
This add will spawn and attack a player with high threat. Usually this is the healer, but sometimes it can be dps as well. If you are using the 4 DPS 1 Healer composition, you’ll need the person who is being targeted by the Sentry to run away from the add, or to have the healer heal them very well.
To avoid getting your healer targeted; try having your healer do minimal healing and reduce the amount of overhealing as much as possible so that the Sentry targets a DPS player instead.
The add is immune to damage.
The Sentry crits for ~15k physical damage. If you have your own runspeed buff (like with Inquisitor), or can provide it to the target (like Sentinel’s runspeed ability) it can help out here. Again though, if your DPS is good enough to DPS her down before her Power Level hits maximum, you can choose to have a Cleric Tank tank this add through overhealing threat.
Repair Bot
At some point in time a Repair Bot will spawn. It spawns on the side and when it reaches P.a.U.L.A., it’ll start healing her. DPS this add down. If you go for the 4 DPS 1 Healer composition, chances are you might end up avoiding this mechanic entirely.
Summary:
- Make sure you all run in at once – as soon as she aggros someone who is near the entrance, she’ll close the door and you’ll have to suicide to reset her.
- Heal through Lightning Arc AoE channel.
- Avoid Conal Attack.
- Run away from Titanguard Sentry if he is targeting you under a 4 DPS 1 Heal setup; otherwise get your Cleric Tank to tank him through overhealing threat. He is immune to damage.
- If Repair Bot spawns, dps him down.
- Burn Boss before Power Level reaches max.
Right now there’s been a lot of comments about this last boss and the immune Titanguard Sentry’s aggro properties. There could be possible adjustments/fix coming in in the future although I wouldn’t hold my breathe on it if the Sentry’s mechanics are intended.
And that’s that! All the best in this dungeon!

Nemesis IV’s burst fire can be interrupted.
i tryed tanking Titanguard Sentry they were non tauntable and u can not pull them they go straight for healer then the dps
Yea, right now it seems as though they can be aggro’d via overhealing threat (at least according to the forums); which is possibly why a Cleric tank could work.
I’ve also heard people using defiler’s Beacon to tank it.
Also, the first time we fought it, it went straight for the healer; however the second time it went straight for me as DPS – the crystal was targeting me so it seems as though I held threat on it.
My suggestion is to either use a cleric tank with overhealing; have the healer hold off overhealing too much by just healing you guys a bit (or shielding you) during AoE phase; or be in specs with decent runspeed buffs to run away from the add.
I have also heard it could ‘potentially’ be proximity-based (based on proximity to his spawn location) but I’d have to test that out a few times to be sure.